
Learn To Add Handwriting To Your Photos

Well, this is the first post from Photoshop series. I'm super excited to share Photoshop techniques with you. For my first tutorial, I decided to tackle one of the biggest reader requests we get. In this article I'll share the easy steps for adding your own handwriting to photos using Photoshop Elements, plus my own personal tips.

I use a Wacom Bamboo Connect Pen Tablet to add handwriting to my photos. A few months back I posted about it and many of you asked for additional tips and tricks! There are many different tablets
(NOTE: If you do not have a tablet you can still use your mouse to add handwriting. It may not be as smooth, but for smaller things like a heart or an arrow it will still work using these instructions.)

1. Choose your photo + open it in Adobe Photoshop Elements. When choosing photos to add handwriting to I like to choose photos with some white space. I even take photographs with this white space in mind so that I can add handwriting in Photoshop.
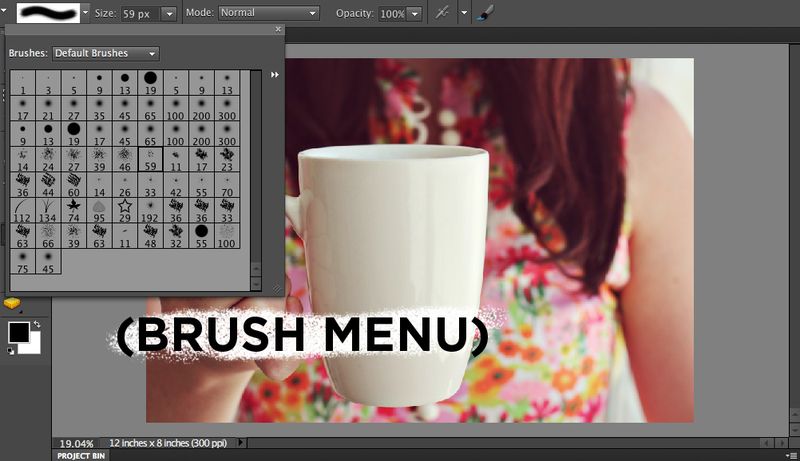
2. Choose your brush. Next, select the size, opacity and color. I labeled these in the screen shot above. A. Brush tool- There is also a drop down menu at the top where you can choose different brushes (seen below). B. Size- I always try at least two or three sizes after choosing a brush. I try to make my photos look like they were drawn on by pencils or markers, so I keep the sizes very small. C. Opacity- By reducing the opacity of your brush you can make your lines appear darker or see through. I often reduce the opacity when I underline words. D. Color- Choose the color you want to draw with. I normally use black of white, but you can choose any color by clicking on the square.

3. Zoom in and try different brushes. Choose your favorites! You can zoom in by pressing Command and + at the same time. I usually zoom in when writing to get a better view of my handwriting. When you are zoomed in you can see the differences between each brush much more clearly.

4. Try different colors for your handwriting + drawings. I mentioned this in step two, but let's take a closer look. When you click on the color icon (the black/white squares on the sidebar above) you can choose colors for your drawings. Choice of color is super important. If you choose to branch out from black and white you will want to spend some time experimenting with how the colors look on your photo.

5. Have fun + experiment! The possibilities are endless! You can also use your tablet as your mouse. Once you become comfortable with it you'll be surprised how often you want to use it. :)

They are great. Above is an example of a bunch of different brushes from the default menu. Experiment with opacity, size and color to give them the look at feel you want.
See Reference
0 comments: